
Setting up a Raspberry Pi (1)
Part 1: Getting the Hardware and Operating System ready.
There are many guides on how to set up a Raspberry Pi, this is just a post on how I do it.
It is how it seems to work out for me, and how I use my Raspberry Pi’s.
But by in no means, is this the best way, or most optimized way, it is my way (for now).
I just started using Raspberry Pi’s, Linux, etc.. a few months ago, so a lot of what I am doing, is copy, paste from other guides, I got soooo much to learn still.
First of all what do you need for this:
The links are to what I use, you can of course use any alternative you want, I just know that what I linked works.
- Raspberry Pi
I’m using: - Power supply
I’m using:- For Raspberry Pi 4’s: Original Raspberry Pi – 5V, 3A, USB-C
- For Raspberry Pi Zero’s: 5V, 1A, Micro-USB
- Micro SD card, (any, min. 8GB, min. class 10/U1/V10, will do).
- Adapter Micro SD card – USB
Optional:
- Network cable, if you want to connect the Raspberry Pi 4 to your network using a cable in stead of WiFi.
- USB storage device, like a extrenal SSD to connect via USB 3, for better preformance.
Do check the many youtubes or websites on what external USB storage device is actually faster, (hint an old thumb drive is often not an improvement.)
What information do you need before we start:
- Access information of your Wifi network:
(So the Raspberry Pi’s can connect to the network over Wifi, thus not needed if you use a network cable to connect to your network)- SSID (the name of your Wifi network).
- Wifi password (the password for logging into the network).
- Access information of your Network Router:
(For giving the Raspberry Pi’s a fixed IP address)- IP address of the router.
- Router Password (to access the router dashboard).
And that is pretty much it, the rest of the steps I will cover in these posts.
I use Windows 10 PC, if you use a Apple or Linux system, sorry I will not cover those, just because I do not own them and I have no idea how to operate them.
The general idea however, should be the same, for example the Imager I use, is also available for all those platforms.
The software I will be using op the PC is:
- Raspberry Pi Imager for Windows (from Raspberry Pi Foundation)
- File Explorer (from Microsoft: installed with Windows 10)
- Notepad (from Microsoft: installed with Windows 10)
- Windows PowerShell (from Microsoft: installed with Windows 10)
Lets get started
- Step 1: Getting the software for “burning”/”etching” the OS:
- a. Download the Raspberry Pi Imager, from the Raspberry Pi Foundation website.
- b. Install it on your PC.
I know, I know there are other imagers and etchers out there, you do you and use whichever one you like, but I use this one, because it is from Raspberry Pi foundation, and I find it easy.
- Step 2: “Burning”/”etching” the OS to the SD-Card:
- a. Put your micro SD-card in the usb adapter and connect to the PC
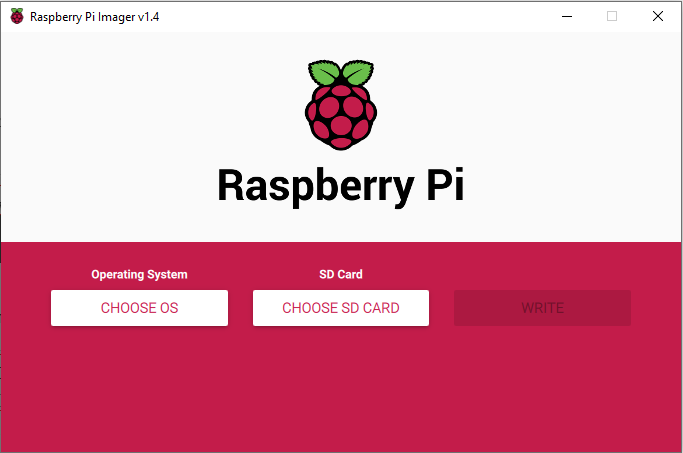
- b. Launch Raspberry Pi Imager.
- c. Select the OS you want to install on the SD card from the [Choose OS] menu,
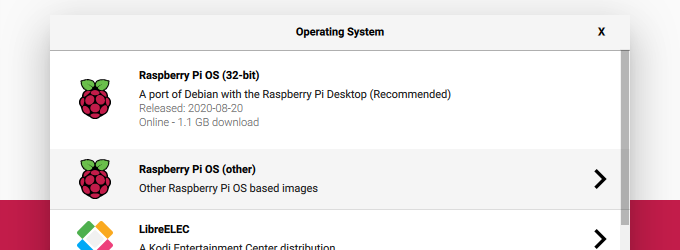
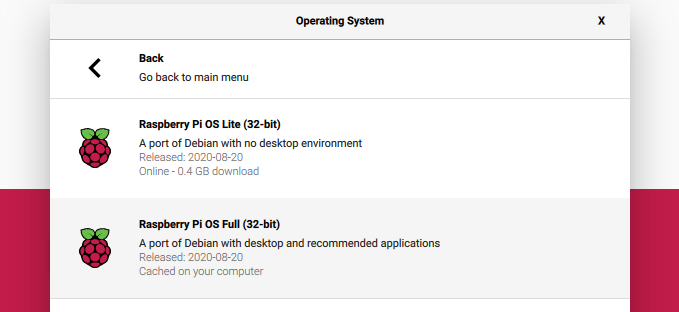
I use:
“Full” install for my Raspberry Pi 4’s.
“Lite” for My Raspberry Pi Zero’s.
- Step 2 (cont.):
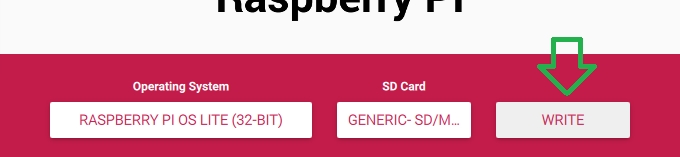
- d. Select the Micro-SD card form the [Choose SD Card]
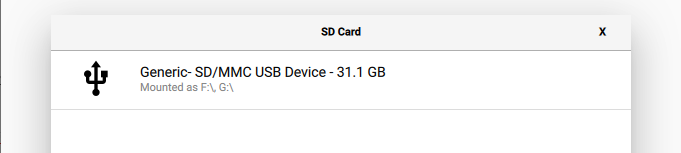
Watch out !!! Select the right SD-Card, if you got more than 1 storage device connected, for it will be wiped, better check twice!!!!
- Step 2 (cont.):
- e. Click [Write], and wait till it pops up a massage it is done and you can remove the SD card.
- Step 3: Getting “SSH” setup.
I want to access/control my Raspberry Pi’s from my PC and I use SSH (Secure Shell) for that.
If you plan to use a keyboard, mouse and monitor on your Raspberry Pi you can skip this step.- a. Reconnect the Micro SD-card to the PC again.
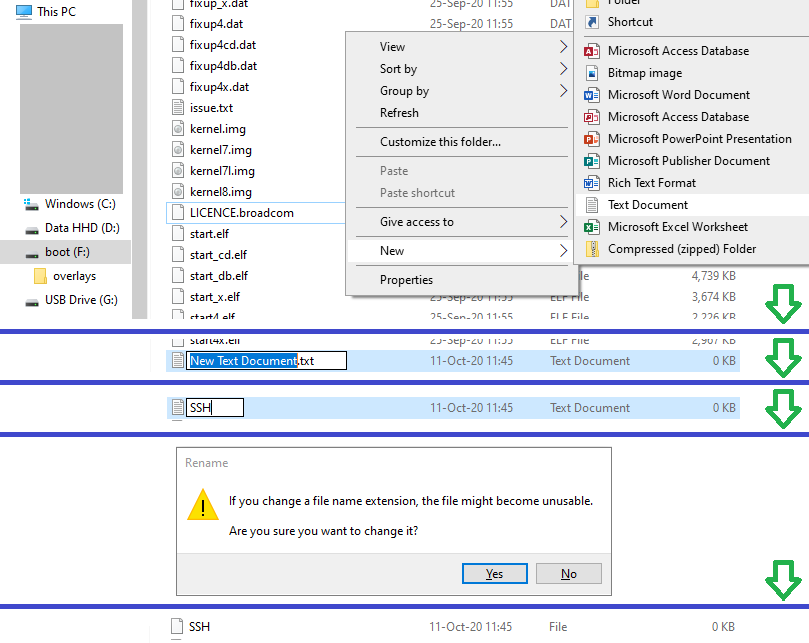
- b. Use the “File Explorer” to go to the drive called “Boot”, in my case “F:”
- c. Right click in the “Boot” drive, root folder,
Select >New >Text document.
Name itSSH
without an extension, so remove the “.txt” part.
If you do not see the “.txt”, select at the top of the “File Explorer” “View”, look for the checkbox [File name extensions] and check it, you should now see the extensions of files like the “.txt” .
- Step 4: Getting “Headless setup” setup.
This step is only needed if you have to use Wifi to connect to your network, and don’t want to use a keyboard/mouse/monitor, connected to your Raspberry Pi.- a. Use the “File Explorer” to go to the drive called “Boot”, in my case “F:”
- b. Right click in the “Boot” drive, root folder,
Select >New >Text document.
Name itwpa_supplicant.conf
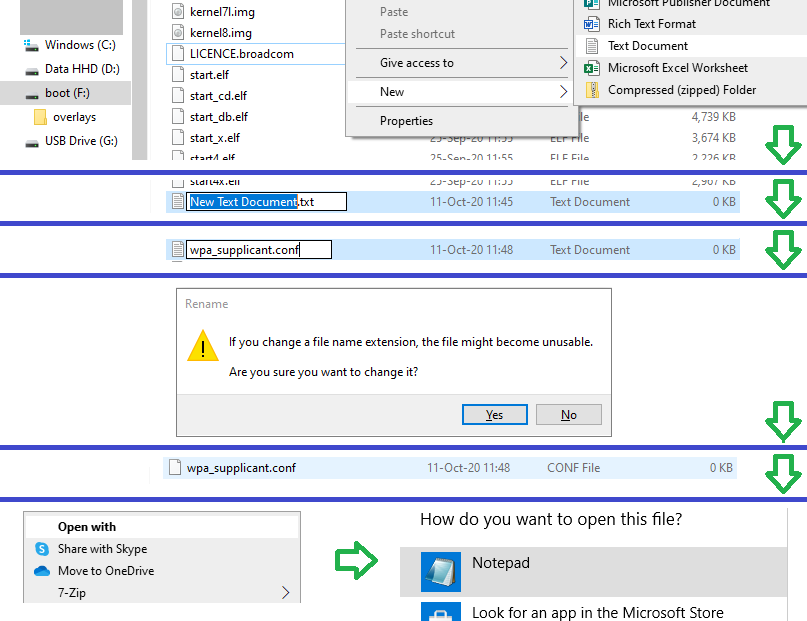
- Step 4 (cont.):
- c. Open the file with notepad and add the code :
ctrl_interface=DIR=/var/run/wpa_supplicant GROUP=netdev
update_config=1
country=NL

network={
 ssid="myWifiNetworkName"
 psk="aRealyH4rdP455word"
}
Change the following:country=NL, to your ISO 3166-1 country code for me it is NL.ssid="myWifiNetworkName", to your ssid inside the ” “.psk="aRealyH4rdP455word", to your wifi password inside the ” “.
- Step 4 (cont.):
- d. save and close the file (and notepad).
- e. Remove the Micro SD card.
Do use safe eject, for I got my USB hub budged, when I just pulled it one time, and it is a pain to get it un-budged again
Congratulations, you have done it.
Now put your Micro SD card in the Raspberry Pi, and connect the power.
(if you use a network cable make sure it is connected before powering up)