Setting up a Raspberry Pi (2)
Part 2: Starting up the Raspberry Pi for the 1st time.
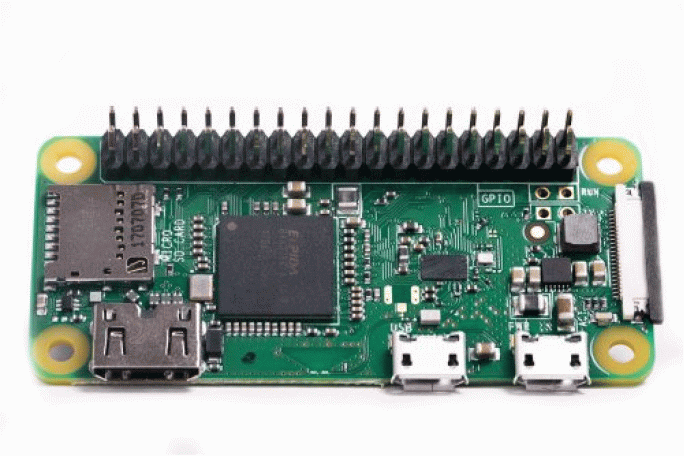
Okay, if you went thru Part 1 of this series, your Raspberry Pi is now starting up, for the 1st time, now what?
We, or better You, are going to connect to the Raspberry Pi for the 1st time.
Everything you are going to do, you will do form the Command Line Interface (CLI).
Old fashion typing out commands, can it be done differently yes, but I’m not going to cover that, typing out all the things gives you way more insight into what is what and where is it hiding/located.
Using a desktop or Graphical User Interface (GUI), is nice but it tends to hide where things are and how they work.
It is the difference between working on a car engine, trying to know how it works, figuring out what does, and where is this set-screw for, or just step into a car, turn the key to start, and hope it works.
If you want the second option, stick to a PC or Apple computer, or your Raspberry Pi with a keyboard/mouse/monitor connected.
Now lets get started:
- Step 1: finding out what IP address your Raspberry Pi is using.
- a. Use a method that works for you, to find the IP address of your Raspberry Pi on the network.
Like in your Router setup, or a program like Advanced IP Scanner,
(I usually use my Router, and look in the list of connected devices.
I have to be in the Router setup anyway, to assign a fixed IP address to the Raspberry Pi later on. )
- a. Use a method that works for you, to find the IP address of your Raspberry Pi on the network.
- Step 2: Getting connected by SSH.
- a. Launch PowerShell.
(typePowerShellin your [Search], next to the [Start] button on your menu bar, You might want to add it to the “Start Menu” or put a link on your desktop, for it is the main way to connect to your Raspberry Pi) - b. Type:
ssh [email protected]
(!!! Use the IP address of your Raspberry Pi, you found in Step 1 !!!)
–ssh> Command start a Secure Shell.
–pi> Name of the user used to log into the Raspberry Pi, “pi” is the default user created by the OS.
–@192.1....> At “IP address”.
So it means: Start a Secure Shell connection to the “IP Address”, as user “pi”. - c. Now you will get a message asking if you are sure you want to connect to this new device, type:
yes- If you used HSS on this IP address before and things went wrong or you wanted to reinstall the OS etc., you will get an error message telling you that the host is not the same or so.
To solve this:
– Use “Windows File Explorer” go to the directory/map:this PC > Windows (C:) > Users > "your username" > .ssh
If you can not see the directory, select the tab [View] in “File Explorer”, and check the box for [Hidden Items], you should see it now.
– Right click theknown_hostsfile, and open with “Notepad”.
– Delete the entire line with the IP address you are trying to connect to.
– [Save] and [Close] the file.
– and try again.
(using the [arrow up/down key] will let you scroll thru previous commands typed in the “PowerShell” so you do not have to retype the command) - If you did not give the Raspberry enough time to start up you will get a “Timed out” or “connection denied” message just give it a sec and try again.
- If you used HSS on this IP address before and things went wrong or you wanted to reinstall the OS etc., you will get an error message telling you that the host is not the same or so.
- d. type the password:
raspberry
this is the default password for the user “pi”
- a. Launch PowerShell.
You should see now a bunch of text ending in:
……………..th ABSOLUTELY NO WARRANTY, to the extent
permitted by applicable law.
pi@raspberrypi:~ $ ▄
Congratulations
You are now connected to your Raspberry Pi, with a SecureShell connection, and your cursor is blinking in them CLI (command line interface) or terminal on your Raspberry Pi, anything you type now is executed on your Raspberry Pi, like you were typing it on a keyboard attached to the Raspberry Pi itself.
- Step 3: Change the default Password !!!
- a. Type:
passwd
Change the default password to something else, it does not matter to what, as long as you do not keep the default, so even a “weak” password will do.
Of course depending on what you want to do with the Raspberry Pi, you might want to set a stronger one.
If you are going to follow this guide, you will be setting the SSH up so you can only log in with a encryption key, and no longer a password.
Other programs like VNC (if enabled) will however still use the password.
– You will not see *** or anything else, when typing a password, this is just how Linux handles passwords.
- a. Type:
- Step 4: Expanding Storage Space / File system.
Although Raspberry Pi OS should do this automatically with the first boot up, I found out more than once that it did not happen (yet), could be because of the headless boot, or me being to impatient and I did not wait long enough, for the OS to finish the whole first time boot up sequence, before connecting.
So as a good practice it is the best thing to do right after changing the default password.
What this does is, expanding the volume/partition “Raspberry Pi Imager” made for the Raspberry Pi OS, to the maximum available space on your Micro SD Card.
(The “Imager” made a partition just big enough to hold the image of the OS, because you could have used a 8GB or a 128GB card and the Imager did not need all that space, to make it all work, but you do.)- a. Type:
sudo raspi-config.sudo> Super User Do, this gives the “pi” (default) user administrator rights for the command that follows.
Because “pi” is part of the “Administrator” group on the Raspberry Pi by default, the normal user rights can (temporarily) be elevated to administrator rights, to do things that need it, with thesudobefore command.raspi-config> Launches the “Raspberry Pi Software Configuration tool” the CLI/Terminal way of changing the configuration.
(There is of course a Desktop/GUI version as well, if you connect with keyboard/mouse/monitor directly to the Raspberry Pi) - b. Use [↑] and [↓] keys to go to option:
7 Advanced Options .... - c. Press [Enter].
- d. Stay on option:
A1 Expand Filesystem .... - e. Press [Enter].
It wil show a message:
- a. Type:
Root partition has been resized.
The filesystem will be enlarged on next reboot
- Step 4 (cont.):
- f. Press [Enter].
it should go back to the main menu.
- f. Press [Enter].
- Step 5: Change Localization (while we are here).
This is not strictly needed to make every thing work, but it helps to get rid of some of the warning message’s, you see when connecting to the Raspberry Pi, and makes the clock run on local time, use the right keyboard layout etc.
– If you already closed the “Raspberry Pi Software Configuration tool” just retype:sudo raspi-config.- a. Use [↑] and [↓] keys to go to option:
4 Localisation Options ....
- b. Press [Enter].
- c. Stay on
I1 Change locale .., and press [Enter] - d. Select out of the list your local setting, using the [↑] and [↓] keys.
For me it is:nl_NL.UTF-8 UTF-8.
Select the UTF-8 version of your locale by default, as the text at the top suggests, (so if you do not know why you would want to pick the other version, pick the UFT-8 one). - e. Press [Enter].
- f. Than use the [↑] and [↓] keys to select the Default locale for the system environment.
For me that is:en_GB.UTF-8. - g. Press [Enter]
you see a message that it can take a little, just wait and it should come back in the “Main menu” - h. Use [↑] and [↓] keys to go back to option:
4 Localisation Options ....and press [Enter] - i. Use [↑] and [↓] keys to go to option:
I2 Change Timezone, and press [Enter] - j. Use [↑] and [↓] keys to select your geographical zone, and press [Enter] to select.
For me it is:Europe - k. Use [↑] and [↓] keys to select your time zone, by selecting the right city or region, press [Enter] to select.
For me it is:Amsterdam - l. Use [↑] and [↓] keys to go back to option:
4 Localisation Options ....and press [Enter] - m. Use [↑] and [↓] keys to go to option:
I3 Change keyboard layout, and press [Enter]
This should automatically change it, and go back to the main menu. - n. press [Tab] to go to the <Select> and press [↓] key to go to <Finish> and press [Enter]
- o. DO NOT press [Enter], on the question would you like to reboot now?, wait till after you finished Step 6.
- a. Use [↑] and [↓] keys to go to option:
- Step 6: Set a Fixed IP address for your Raspberry Pi.
- a. Open a browser, and connect to your Router’s setup with the Router IP-address and password.
It’s not strictly needed, to give the Raspberry Pi a fixed IP address, it does make life a lot easier, not having to scan for the IP address, every time you reboot the Raspberry Pi.
– If you do not have access to your router, or don’t want to change anything in there, you can skip this step. - b. Go to the IP section in your router, your will have to search the interwebs, or manual where this is located in your specific router.
For me it is:
–Advanced settings>DHCP: optionAdd IP-address reservation
– Select the Raspberry Pi from the list of connected devices.
– Give it a new IP address, like100 - c. Don’t forget to [Save Changes], you can now and log out of the Router, and close your browser.
- d. Go back to the “PowerShell” and finally press [Enter] on the question would you like to reboot now?
Remember: you changed the Volume/Partition size, and that needs a reboot, the new appointed (fixed) IP address needs a reboot as well. - If you did, not wait with rebooting, skipped it, or closed “PowerShell” altogether follow these steps:
- Type
ssh [email protected]
(if you are no longer connected)
– Use the old IP-address from before you changed it in this Step 6.
– Use the newPassword, you picked for the Raspberry Pi, in Step 3 of this post.
(if you managed to forget the new password, look at the bottom of this post). - Type
sudo reboot
- Type
- a. Open a browser, and connect to your Router’s setup with the Router IP-address and password.
The “Windows PowerShell” should look something like this:
Connection to 192.168.100.000 closed by remote host.
Connection to 192.168.100.000 closed.
PS C:\Users\”your name”>
- Step 7: Reconnecting to the Raspberry Pi again.
- a. Type:
ssh [email protected]
(!!! Use the new IP address of your Raspberry Pi !!!)
– If you did not give the Raspberry enough time to start up you will get a “Timed out” or “connection denied” message just give it a sec. and try again.
- b. Type the new
Password, you picked for the Raspberry Pi, in Step 3 of this post.
You should see now a bunch of text ending in:
Note, that the warnings like “change password” and “no locale set” will be gone now.
- a. Type:
……………..th ABSOLUTELY NO WARRANTY, to the extent
permitted by applicable law.
pi@raspberrypi:~ $ ▄
If you managed to forget the password you set, you can do 2 things:
- 1. Starting over, by:
- Power the Raspberry Pi off,
- Remove the Micro SD card,
- Redo Step 2 in, Part 1: Getting the hardware and operating system ready,
- Start with Step 1 of this Post.
– You will have to edit the “known_hosts” file as explained in Step 2c.
- 2. Connect to the Raspberry Pi directly, by:
- Power the Raspberry Pi off,
- Connect to your Raspberry Pi with a keyboard/mouse/monitor,
- Power it back on,
- Depending if it starts in CLI/Terminal or Desktop/GUI,
start the Raspberry Pi configuration tool” again either with typing:sudo raspi-configor find it and select it form the desktop somewhere (I think it was right top or so),
- select the option:
1 Change User Password ..
this should prompt you to enter a new password for user “pi”, without asking for the old one.
Don’t feel ashamed to do it all over again, for I did it many times, just see it as practice. It also learns you to not get to attached to what is installed, for you might want to check other OS’s out, or have multiple projects for your Raspberry Pi, on different Micro SD Cards. With a simple card switch or reinstall, you can do that, where you might not do that on your main computer so easily.
<< Part 1: Getting the hardware and operating system ready
Part 3: Setting up the Raspberry Pi for USB boot/SSH key. >>